


Post-Production – Defining the “look”, the script, and not crashing Nuke
- Travis Parkes
- Mar 12, 2023
- 5 min read

I quickly realized that in order to maintain a manageable workflow for my project, I needed to create sections within my script that I could pre-compose. This would help prevent things from slowing down too much, especially considering everything was in 4k resolution. I divided my pre-comps into the following categories: undistorting and denoising, clean-up, depth of field creation, major CG, and finishing. In hindsight, I could have further subdivided them, but this approach worked well for me since the script was already organized to some extent, and performance was satisfactory with this number of pre-comps.
Since I had shot in cinelog, I had to incorporate a colour transformation in my script. Compositing transformations typically occur in linear space, while the output is usually viewed through sRGB or rec709 colour space. Therefore, I performed a CineSLog3 to rec709 transformation at the beginning of the script. This allowed me to see everything in familiar colours, without sacrificing any of the additional information captured by shooting in s-log.

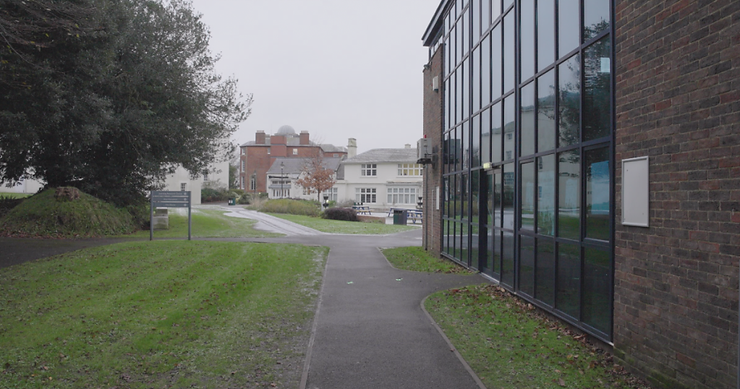
Compositing is not as straightforward as just overlaying element A onto element B in the CG. Although the HDRI had contributed to making the composition look “pretty good,” the robots still didn’t seamlessly blend into the real-world environment. They appeared too sharp, the colors didn’t quite match, there was a lack of motion blur, and I needed to ensure the robots were reflected in the window. Additionally, I hadn’t lit up the eyes of the robots yet.

Additionally, whilst the tracking markers had helped me position things in 3D space by giving me something to look out for, they needed to be removed from the final comp.
Which was easy enough at first. As I had a solid track, so all I needed to do was to project some cloned patches and make sure to match the brightness of the rest of the ground throughout the scene.

But, then a problem revealed itself. Those same tracking markers were also visible in the reflections, which is a lot harder to remove as it’s both a flipped image but also an image within an image.

Because of this, I assumed I could not use the same technique as the non-reflected tracking markers, something I later found out to be untrue due to the nature of the reflection. However, the solution I came up with worked, and so I used it.
I decided to do a 2d track of each of the reflected markers, then upon using that, match moved a stabilised patch either underneath or to the side of the tracking marker. This hid the marker, but it didn’t completely blend because of the sides of the glass. To solve this I created a holdout matte projected from a single frame from the camera to make sure that the patch would not go over this selected area. The solution worked, and the tracking markers were no longer visible upon playback.

With the clean-up solved, the next thing I wanted to add was depth of field. Because there was nothing to keep focus on when filming, the camera operator opted to use deep focus in order to keep as much as possible in shot. In order to add some depth of field later in post I used Nuke’s depth generator and the camera tracker in order to generate a depth pass, then used the magic defocus gizmo in order to use the depth pass to give some realistic depth of field.

The depth generator within Nuke is not perfect however, and there were a few glitches in the background and on the side, so I used a few key mixes and some manually placed blur in order to remove these, but the depth generator got me most of the way there.

The background was kept out of focus which meant the viewer should be drawn to the action in focus. Having depth of field like this also comes across to the average person as more “cinematic”.
Next in the script is the adding of shadows, this is by using a mask of the alpha I rendered out in Maya separately. I chose to keep the contact shadows of the robots separate to ensure maximum flexibility in comp, this also meant I could match the shadow colour to shadows found in the shot (I noticed a very slight hint of blue).


Next, I focused on matching the robots to the scene. This involved grading them to better align with the camera’s look, adding lights to their eyes, and applying motion blur. By dissecting the aovs (arbitrary output variables), I gained precise control over the grading of each light pass. Additionally, I utilized technical passes to isolate specific elements, such as the cryptomatte, to ensure accurate matting of the robots’ eyes. Although I had rendered a motion vector pass from Maya, I discovered that the quality of the data was not particularly high. Instead, I achieved better results by using Nuke’s own vector generate tool. The reference footage I had captured also proved helpful in ensuring visual accuracy.


Compared with the look earlier, thanks to all the grading, the robots both integrate a lot better, and both feel more alive due to the eyes lighting up.
However, as the tracking markers were visible in the windows, the robots would need to be too. I first tried to do this by creating a perfect reflective piece of geometry in maya in the position where the windows were. This meant the reflections were in the right place, but because they were reflections, things like the cryptomatte and the grading did not work as expected. But, with the reflections, I noticed something.

Even though the robots were very obviously mirrored, as long as I flipped them, the only difference is the robots are just to the right and angled slightly. Therefore, I realised I could create a special duplication in maya (this means any cryptomatte transformations would be applied to both the original image and the reflection), and just positioned the robots where they were appearing in the reflection, and the robots were now in the right place, with the same effects applied.
The robots wouldn’t look the same when reflected, so I used a few blending modes and holdout mattes to make them fit. I also noticed reflection opacity was slightly different when there were posters on the other side of the windows, so I adjusted for that as well. Finally, I used a grid warp to make sure the distortion that windows create was replicated.


Before doing the portal, likely the most complicated of the compositing tasks, I made sure I had the visual style for the project defined as well. I couldn’t just reuse the nodes in my test as what was shot had slightly different light levels and colours. However, I could use it as reference to get as close as possible.

Within this I made sure to redistort the image so that the natural distortion properties of the camera were kept in tact, as well as any CG obeying it as well. I did the same for the grain as well.

The portal I made up of 5 elements, plus an additional element to burn the ground in the aftermath of the portal.


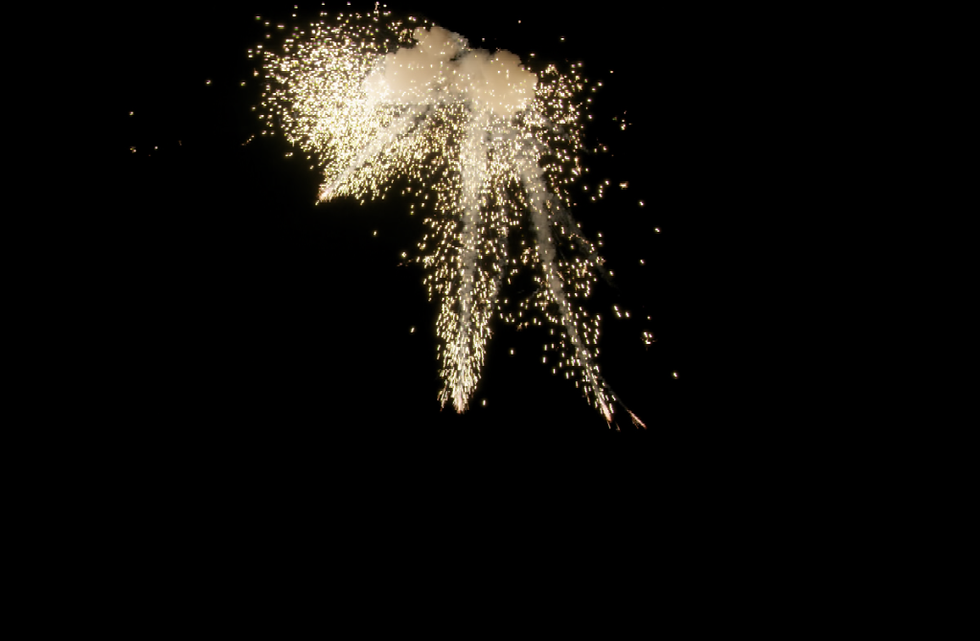

Then with some retiming, grading, projecting the element on a card, and doing the same for it’s reflected counterpart. I was able to create a portal. With the use of the N pass from maya, I was able to create a 3D matte for allowing the robots to transport through.


I overexposed the image when the portal first came in as that much energy would be far too bright for the camera’s exposure to adjust easily, this makes for a more realistic feeling portal.
Comments